
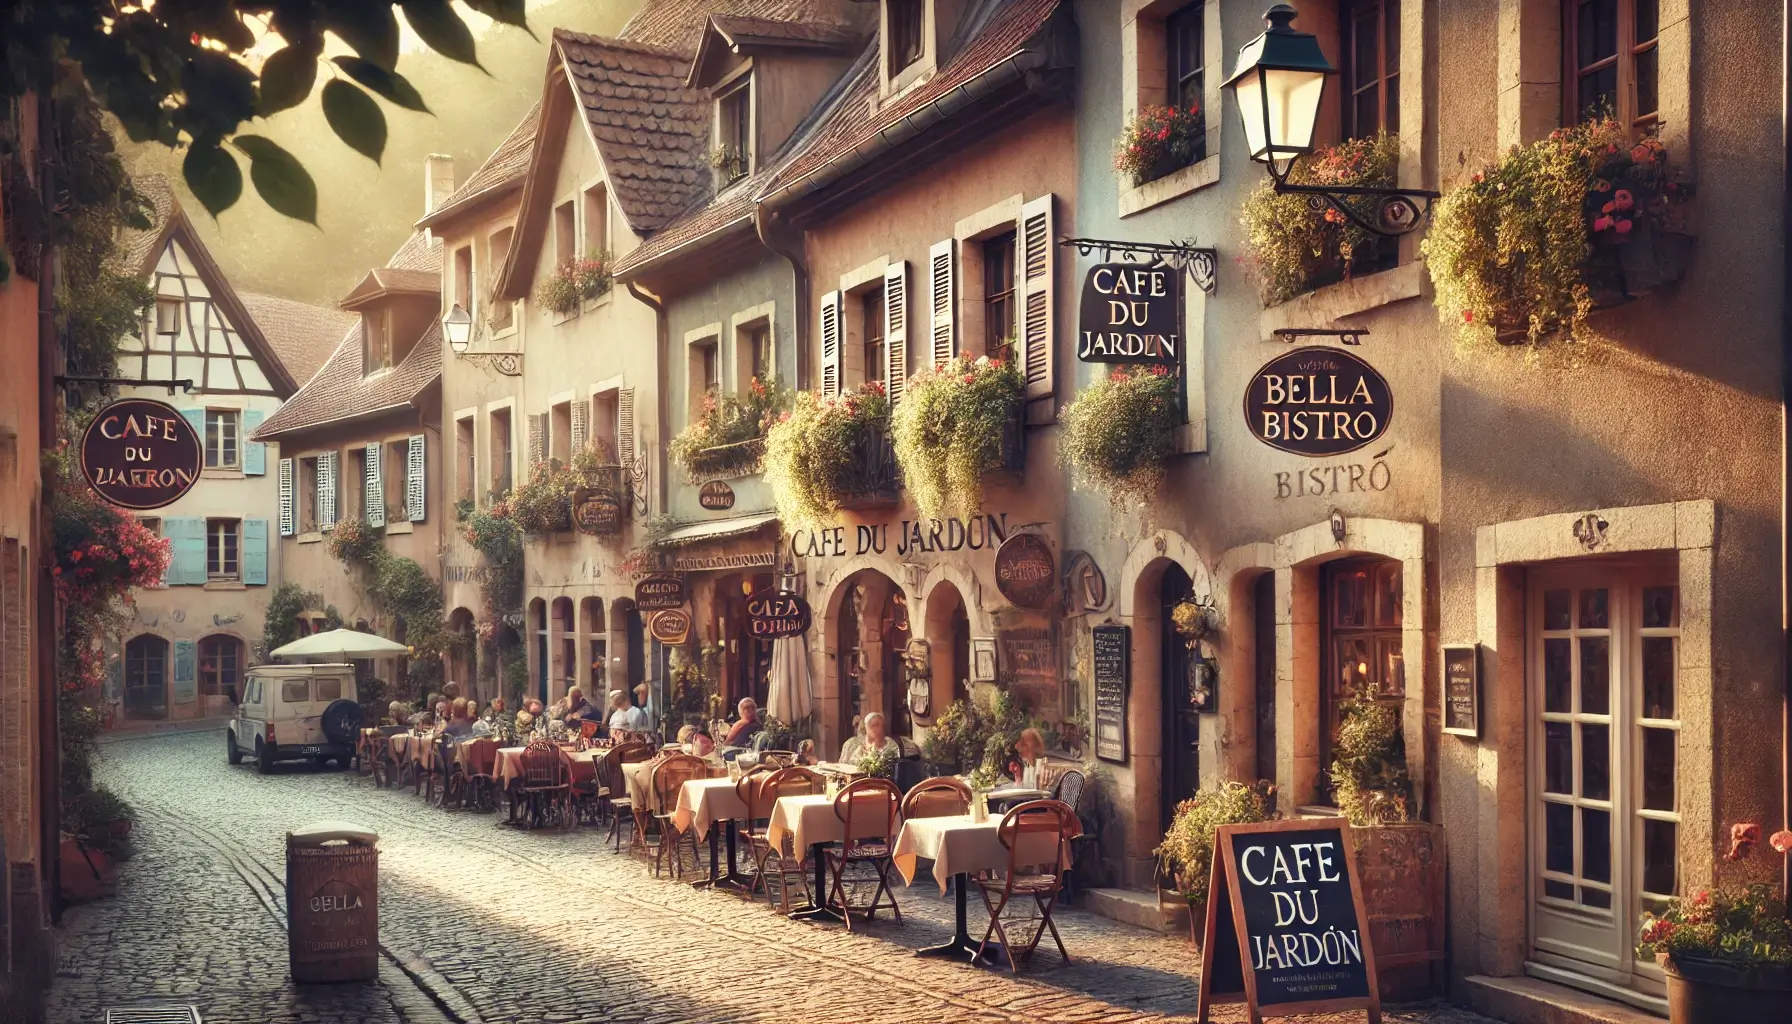
AI-generated art tools like DALL-E, Art Breeder, Krea, and Microsoft Copilot are impressive, producing stunning visuals from simple prompts crafted with the help of an AI writing assistant. However, they still have a significant limitation: add text in AI art that is readable and accurate. If you have attempted to use words or labels with these tools, you would have noticed that the results tend to be gibberish, distorted, or indecipherable.
Therefore, how can you add text to AI art to achieve a professionally polished look for your AI-generated images? The solution is to combine AI art with a graphic design tool such as Canva.
In this guide, we’ll show you how to add text to your AI art or images with Canva to make them more readable and on-brand. For more guidance, explore our posts on AI image prompts, and the best tools for creating AI images. But for now, let’s focus on refining and editing text that may appear distorted or doesn’t meet your expectations.
Why AI Art Struggles with Text
While AI tools like DALL-E are great at generating art, text remains a challenge. AI-generated images may include text-like elements, but these are often distorted and unusable. This is because most AI art generators focus on visual composition, textures, and colors rather than typography or language-specific accuracy. As a result, even if an AI image generator attempts to incorporate text, the output rarely meets professional standards.
Solution: Adding Text with Canva
Canva is a powerful yet user-friendly design tool that makes adding and editing text in AI art easy, professional, and precise. Canva has free features and paid features. The feature I am using below is a paid feature of the Pro Plan which you can try for 1 month free. With Canva, you can combine the unique, artistic qualities of AI-generated visuals by having simple clear text that is also readable and matches your brand. Here’s a step-by-step guide to making it happen.
Step-by-Step Guide: Adding Text to AI Art Using Canva
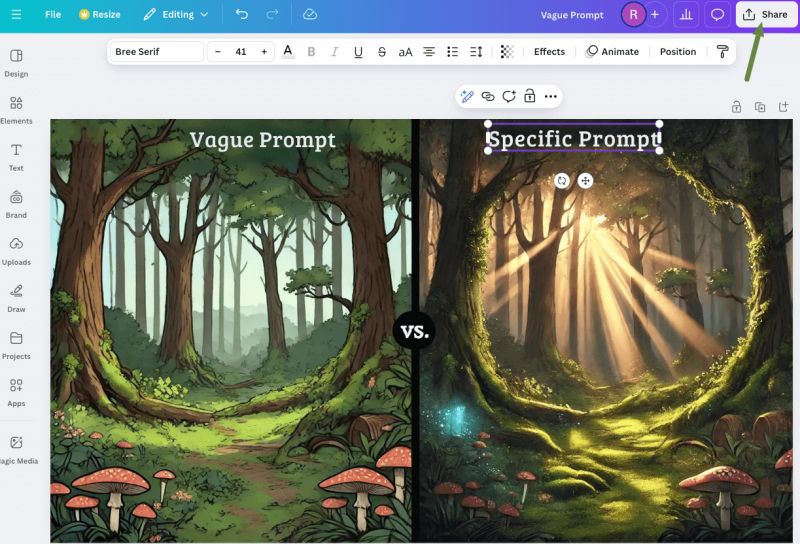
The below arrows in each screenshot will show you what I am referring to.
STEP 1: UPLOAD YOUR IMAGE TO CANVA
Start by uploading your AI-generated image, which you might have created using tools like DALL-E, ArtBreeder, or ImagineArt.
1. Log into Canva: Open Canva and log in to your account.

2. Create a Design: Click on “Create a Design” on the homepage.
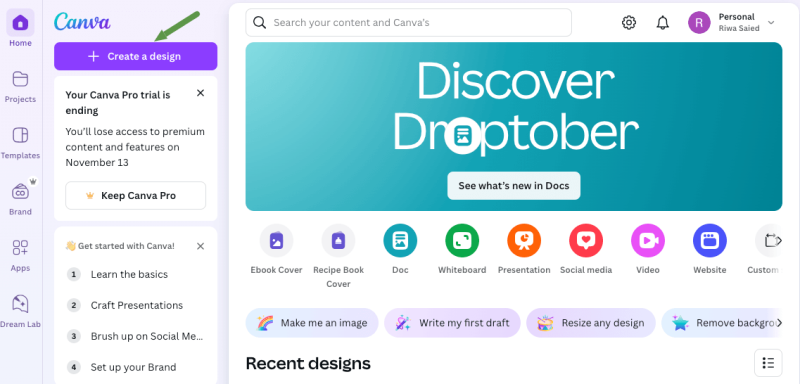
3. Upload Your Image: On the left side menu, choose “Upload” and upload your AI-generated image

4. Edit Text in AI Art:: Once uploaded, select “Use in a design” to start customizing your image.
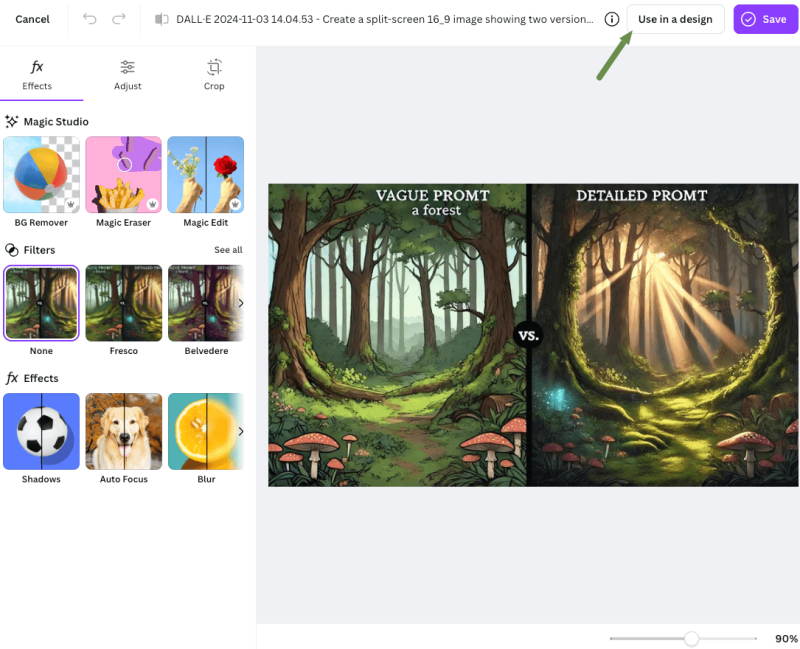
Now, with your AI image ready, it’s time to add text in your AI art as you desire.
STEP 2: ADD TEXT TO YOUR IMAGE
5. Select ‘Grab Text’ from the Sidebar: On Canva’s left-side menu.

Then you can add text after you grabbed it here directly in the text box:
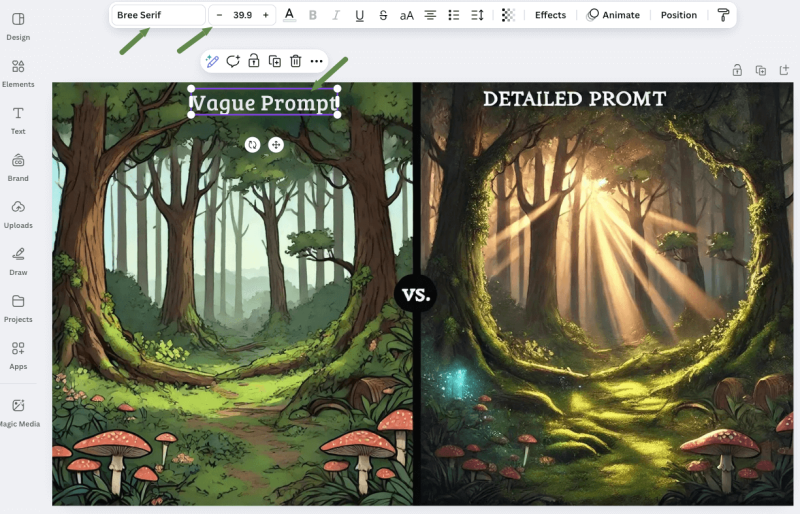
These are some other options:
6. Add text in AI Art: Add a text box and choose from “Add a heading,” “Add a subheading,” or “Add a little bit of body text,” depending on your needs.

7. Choose Your Font: Canva has numerous fonts to suit any style, from bold and modern to classic and elegant. Select a font that complements the theme and tone of your AI artwork.

8. Adjust Font Size and Color: Ensure your text is legible by adjusting the font size and choosing colors that contrast with your image.
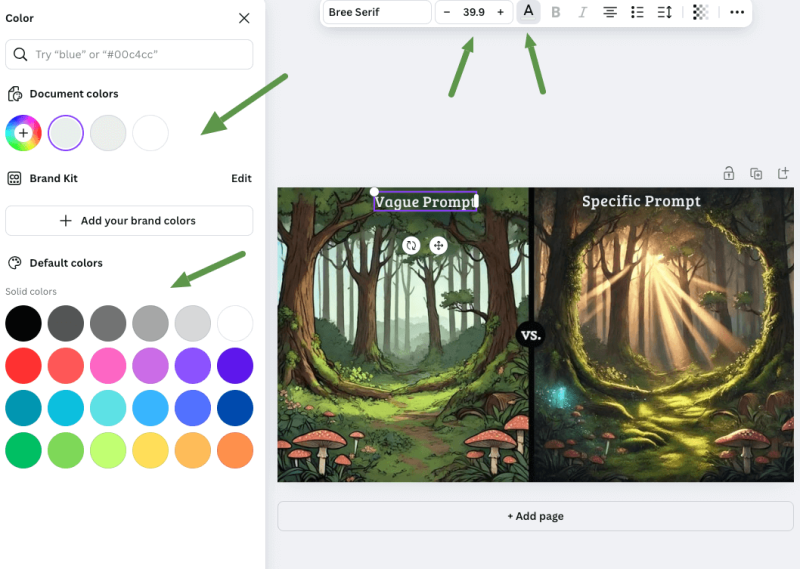
9. Add Effects: Canva offers effects like shadows, glows, and outlines that can make your text stand out and look more cohesive with the image.

STEP 3: EXPORT AND OPTIMIZE YOUR FINISHED DESIGN
Once you’re happy with your text and its placement, it’s time to download and optimize the final image.
10. Download the Image: Click on “Share” in the upper right corner, then choose “Download.” Select the file type that best suits your needs, such as PNG for high quality or JPG for a smaller file size.
- Limit File Size (Optional): If you’re planning to use the image online, you may want to reduce its size. You can specify the dimensions in Canva’s download settings, or use an external tool like TinyPNG to compress the image further.
- Save and Share: Now, your AI-generated artwork with added text is ready to be shared on social media, websites, or any other platform.
Why Canva Is the Ideal Companion for AI Art
With a blend of AI-generated visuals all available within the Canva platform, you can present cohesive, on-brand graphics that clearly communicate your message. Design flexibility is one of the best features of Canva that permits getting your images ready for any platform and adapting to any branding requirement, thus guaranteeing the final result is polished, professional, and impactful.
Conclusion: Leveraging AI and Canva for Stunning Visuals
While using AI for creating art can generate a lot of creative visuals all at once, we are still quite limited in using text through AI. With Canva, you can quickly fill this gap, overlaying text to your AI image and matching the text design with the generated image! It used a workaround, tapping into AI creativity while ensuring proper spelling and consistency in style.
Ready to start experimenting with your AI art? Try pairing it with Canva to take your visuals to the next level.
